
Australian Threepence Master Dies & Die Pairings
Australian threepences were struck with six principal obverse master dies and four reverse master dies between 1910 and 1964. The changes in portrait, legend, rim denticles or beads and reverse alignment provide useful identification points for collectors.
This guide brings the master-die types and the known date-and-mint pairings together in the same easy-reference format as the Klazzik halfpenny master-die guide.
Obverse Master Die Types
The obverse is the portrait side. Six principal obverse types are recorded across the Australian threepence series.

Obverse 1 — 1910
The first Australian threepence carried the portrait of Edward VII. This obverse was confined to the inaugural 1910 issue, making it immediately distinct from the George V type that followed.

Obverse 2 — 1911–1936
Introduced in 1911, the George V portrait became the long-running standard obverse for Australian threepence and remained in use through to 1936.
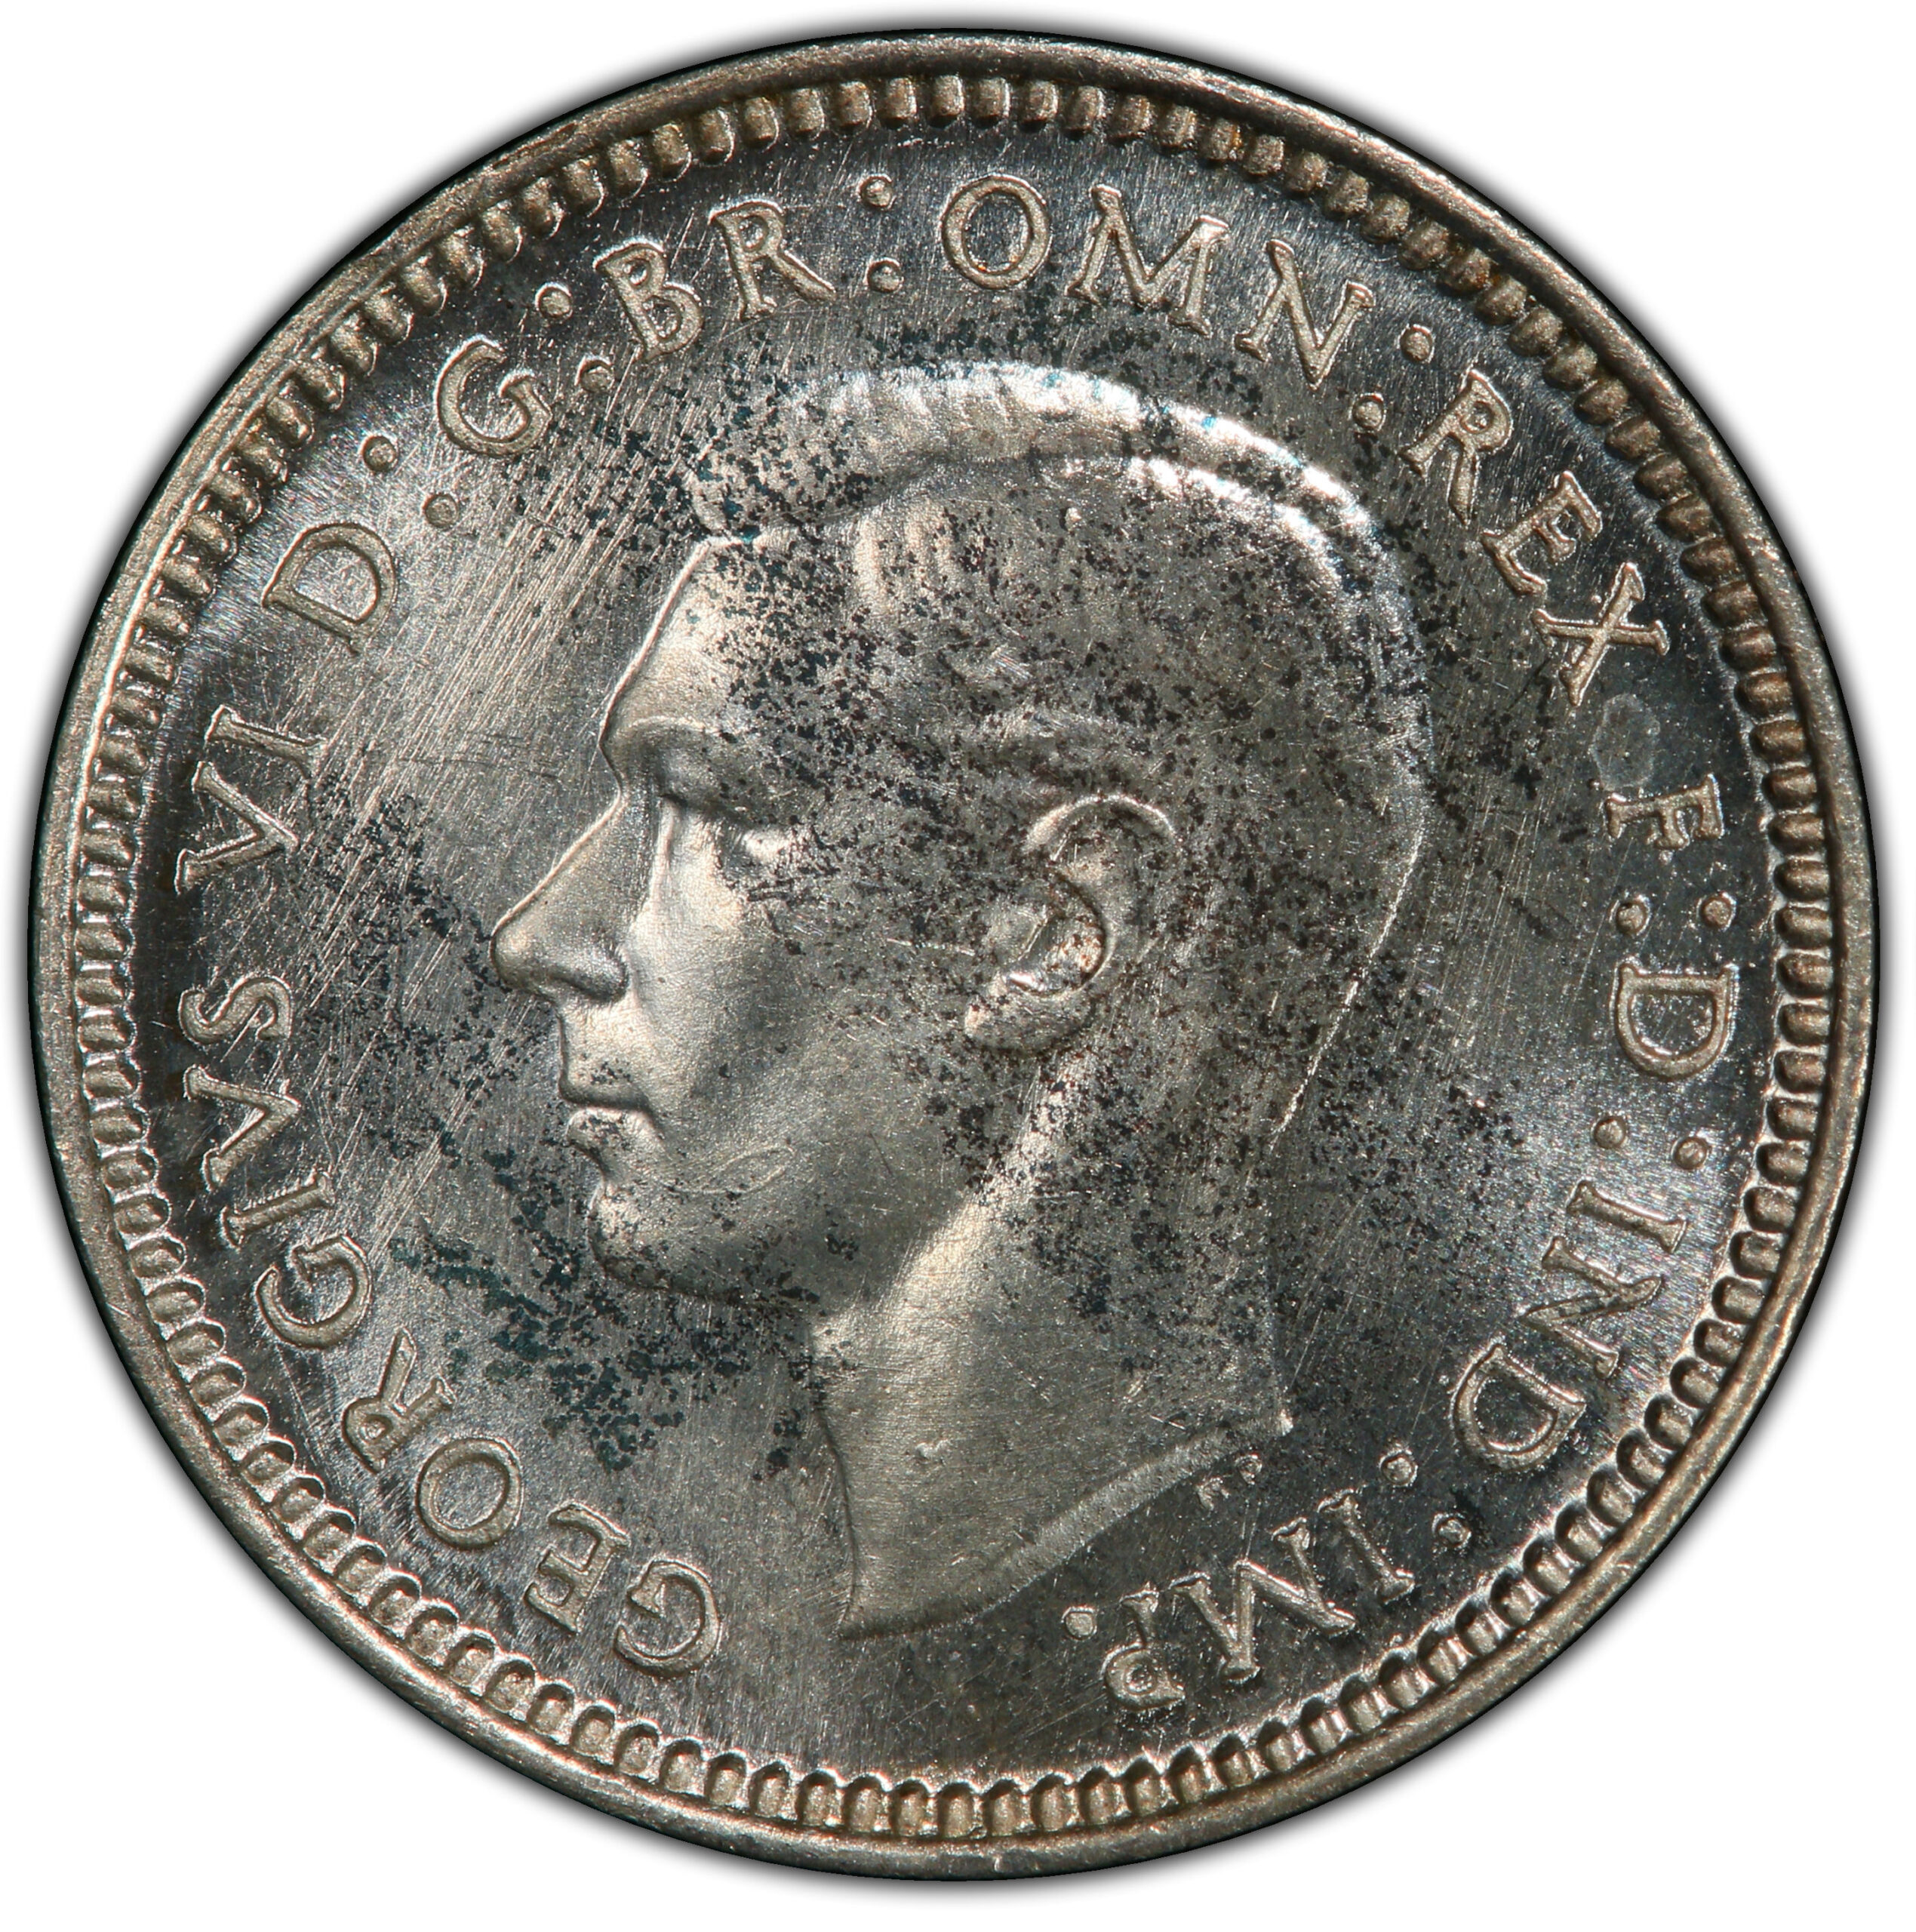
Obverse 3 — 1938–1948
With the change of monarch, a new George VI portrait appeared on the threepence in 1938. This first George VI obverse continued through the wartime years and remained in use until 1948.

Obverse 4 — 1949–1952
A revised George VI obverse appeared in 1949. The legend was altered following India's independence: IND IMP disappeared and the abbreviated F.D. was replaced by the fuller FIDEI DEF wording.

Obverse 5 — 1953–1954
The accession of Elizabeth II brought another major visual change. On this early Queen Elizabeth II type, the traditional rim denticles were replaced by individual rounded beads, providing an easy diagnostic for the 1953–1954 issues.

Obverse 6 — 1955–1964
A revised Elizabeth II obverse was introduced in 1955 and remained in use to the end of the series. F.D. returned to the legend, while the beaded rim was retained with a slightly different count.
Reverse Master Die Types
Four principal reverse types are recorded, including the single-year 1910 reverse and the special 1951 London reverse.

Reverse A
Reverse A belongs exclusively to the 1910 threepence. Its rim and lettering alignment differ from the design introduced the following year, making the two early reverse types relatively straightforward to separate once the key markers are known.

Reverse B
Reverse B replaced the original 1910 reverse in 1911 and then became the standard reverse throughout the George V period, remaining in service until 1936.

Reverse C
Reverse C was the principal later reverse of the denomination. It was used on Melbourne production from 1938 onward and also appears on the wartime threepences struck in the United States at Denver and San Francisco.

Reverse D
Reverse D is the special 1951 London type. Although it closely resembles Reverse C at first glance, the rim count is different and the PL mintmark in the lower ribbon fold gives collectors a clear confirming feature.
Australian Threepence Die Pairings by Year
Once the obverse and reverse have been identified, this table can be used to match the combination to its year and issuing mint. The threepence series is comparatively straightforward because no separate die-pair varieties are listed in the supplied reference.
| Year | Obverse | Reverse | Mint | Variety / Mintmark | Notes |
|---|---|---|---|---|---|
| 1910 | O-1 | R-A | London | Only year for Obverse 1 / Reverse A | |
| 1911 | O-2 | R-B | London | ||
| 1912 | O-2 | R-B | London | ||
| 1913 | O-2 | R-B | London | ||
| 1914 | O-2 | R-B | London | ||
| 1915 | O-2 | R-B | London | ||
| 1916 | O-2 | R-B | Melbourne | ||
| 1917 | O-2 | R-B | Melbourne | ||
| 1918 | O-2 | R-B | Melbourne | ||
| 1919 | O-2 | R-B | Melbourne | ||
| 1920 | O-2 | R-B | Melbourne | ||
| 1921 | O-2 | R-B | Melbourne | ||
| 1922 | O-2 | R-B | Melbourne | ||
| 1922/1 | O-2 | R-B | Melbourne | 2 over 1 Overdate | |
| 1923 | O-2 | R-B | Melbourne | ||
| 1924 | O-2 | R-B | Melbourne / Sydney | The two mints cannot be distinguished by inspection | |
| 1925 | O-2 | R-B | Melbourne / Sydney | The two mints cannot be distinguished by inspection | |
| 1926 | O-2 | R-B | Melbourne / Sydney | The two mints cannot be distinguished by inspection | |
| 1927 | O-2 | R-B | Melbourne | ||
| 1928 | O-2 | R-B | Melbourne | ||
| 1929 | O-2 | R-B | Melbourne | ||
| 1930 | O-2 | R-B | Melbourne | ||
| 1931 | O-2 | R-B | Melbourne | ||
| 1932 | O-2 | R-B | Melbourne | ||
| 1933 | O-2 | R-B | Melbourne | ||
| 1934 | O-2 | R-B | Melbourne | ||
| 1934/3 | O-2 | R-B | Melbourne | 4 over 3 Overdate | |
| 1935 | O-2 | R-B | Melbourne | ||
| 1936 | O-2 | R-B | Melbourne | ||
| 1938 | O-3 | R-C | Melbourne | ||
| 1939 | O-3 | R-C | Melbourne | ||
| 1940 | O-3 | R-C | Melbourne | ||
| 1941 | O-3 | R-C | Melbourne | ||
| 1942 | O-3 | R-C | Melbourne / San Francisco / Denver | U.S. mints helped meet wartime demand | |
| 1943 | O-3 | R-C | Melbourne / San Francisco / Denver | U.S. mints helped meet wartime demand | |
| 1944 | O-3 | R-C | San Francisco | Entire issue struck at San Francisco | |
| 1945 | O-3 | R-C | Melbourne | ||
| 1946 | O-3 | R-C | Melbourne | ||
| 1947 | O-3 | R-C | Melbourne | ||
| 1948 | O-3 | R-C | Melbourne | ||
| 1949 | O-4 | R-C | Melbourne | ||
| 1950 | O-4 | R-C | Melbourne | ||
| 1951 | O-4 | R-C | Melbourne | Part of the issue | |
| 1951 | O-4 | R-D | London | PL | About 40 million of roughly 62 million struck in London; PL in lower fold of ribbon |
| 1952 | O-4 | R-C | Melbourne | ||
| 1953 | O-5 | R-C | Melbourne | ||
| 1954 | O-5 | R-C | Melbourne | ||
| 1955 | O-6 | R-C | Melbourne | ||
| 1956 | O-6 | R-C | Melbourne | ||
| 1957 | O-6 | R-C | Melbourne | ||
| 1958 | O-6 | R-C | Melbourne | ||
| 1959 | O-6 | R-C | Melbourne | ||
| 1960 | O-6 | R-C | Melbourne | ||
| 1961 | O-6 | R-C | Melbourne | ||
| 1962 | O-6 | R-C | Melbourne | ||
| 1963 | O-6 | R-C | Melbourne | ||
| 1964 | O-6 | R-C | Melbourne |
Quick Legend
O-1 to O-6 = Obverse master die types 1 to 6 | R-A to R-D = Reverse master die types A to D.
PL = mintmark found in the lower fold of the ribbon on the 1951 London Reverse D.
Important: No separate die-pair varieties are recorded in the supplied threepence material. For that reason, this table is designed as an attribution guide showing the expected obverse, reverse and mint combination for each issue.