
Australian Sixpence Master Dies & Die Pairings
The Australian sixpence series used six principal obverse master dies and three reverse master dies between 1910 and 1963. Changes to the portrait, royal legend, rim denticles and design alignment provide practical ways to separate the different types.
This guide brings those identifying features together with a year-by-year pairing table so collectors can move from visual identification to date and mint attribution in one place.
Obverse Master Die Types
Six principal portrait-side master dies are recorded for the Australian sixpence.

Obverse 1 — 1910
The first Australian sixpence carried Edward VII and was used only for the opening 1910 issue. Although the portrait changed the following year, the rim count itself remained the same on the succeeding George V type.

Obverse 2 — 1911–1936
George V replaced Edward VII in 1911 and this obverse became the standard portrait side for the denomination through to 1936.

Obverse 3 — 1938–1948
The first George VI sixpence obverse appeared in 1938 and remained in use throughout the wartime production period and into the late 1940s.
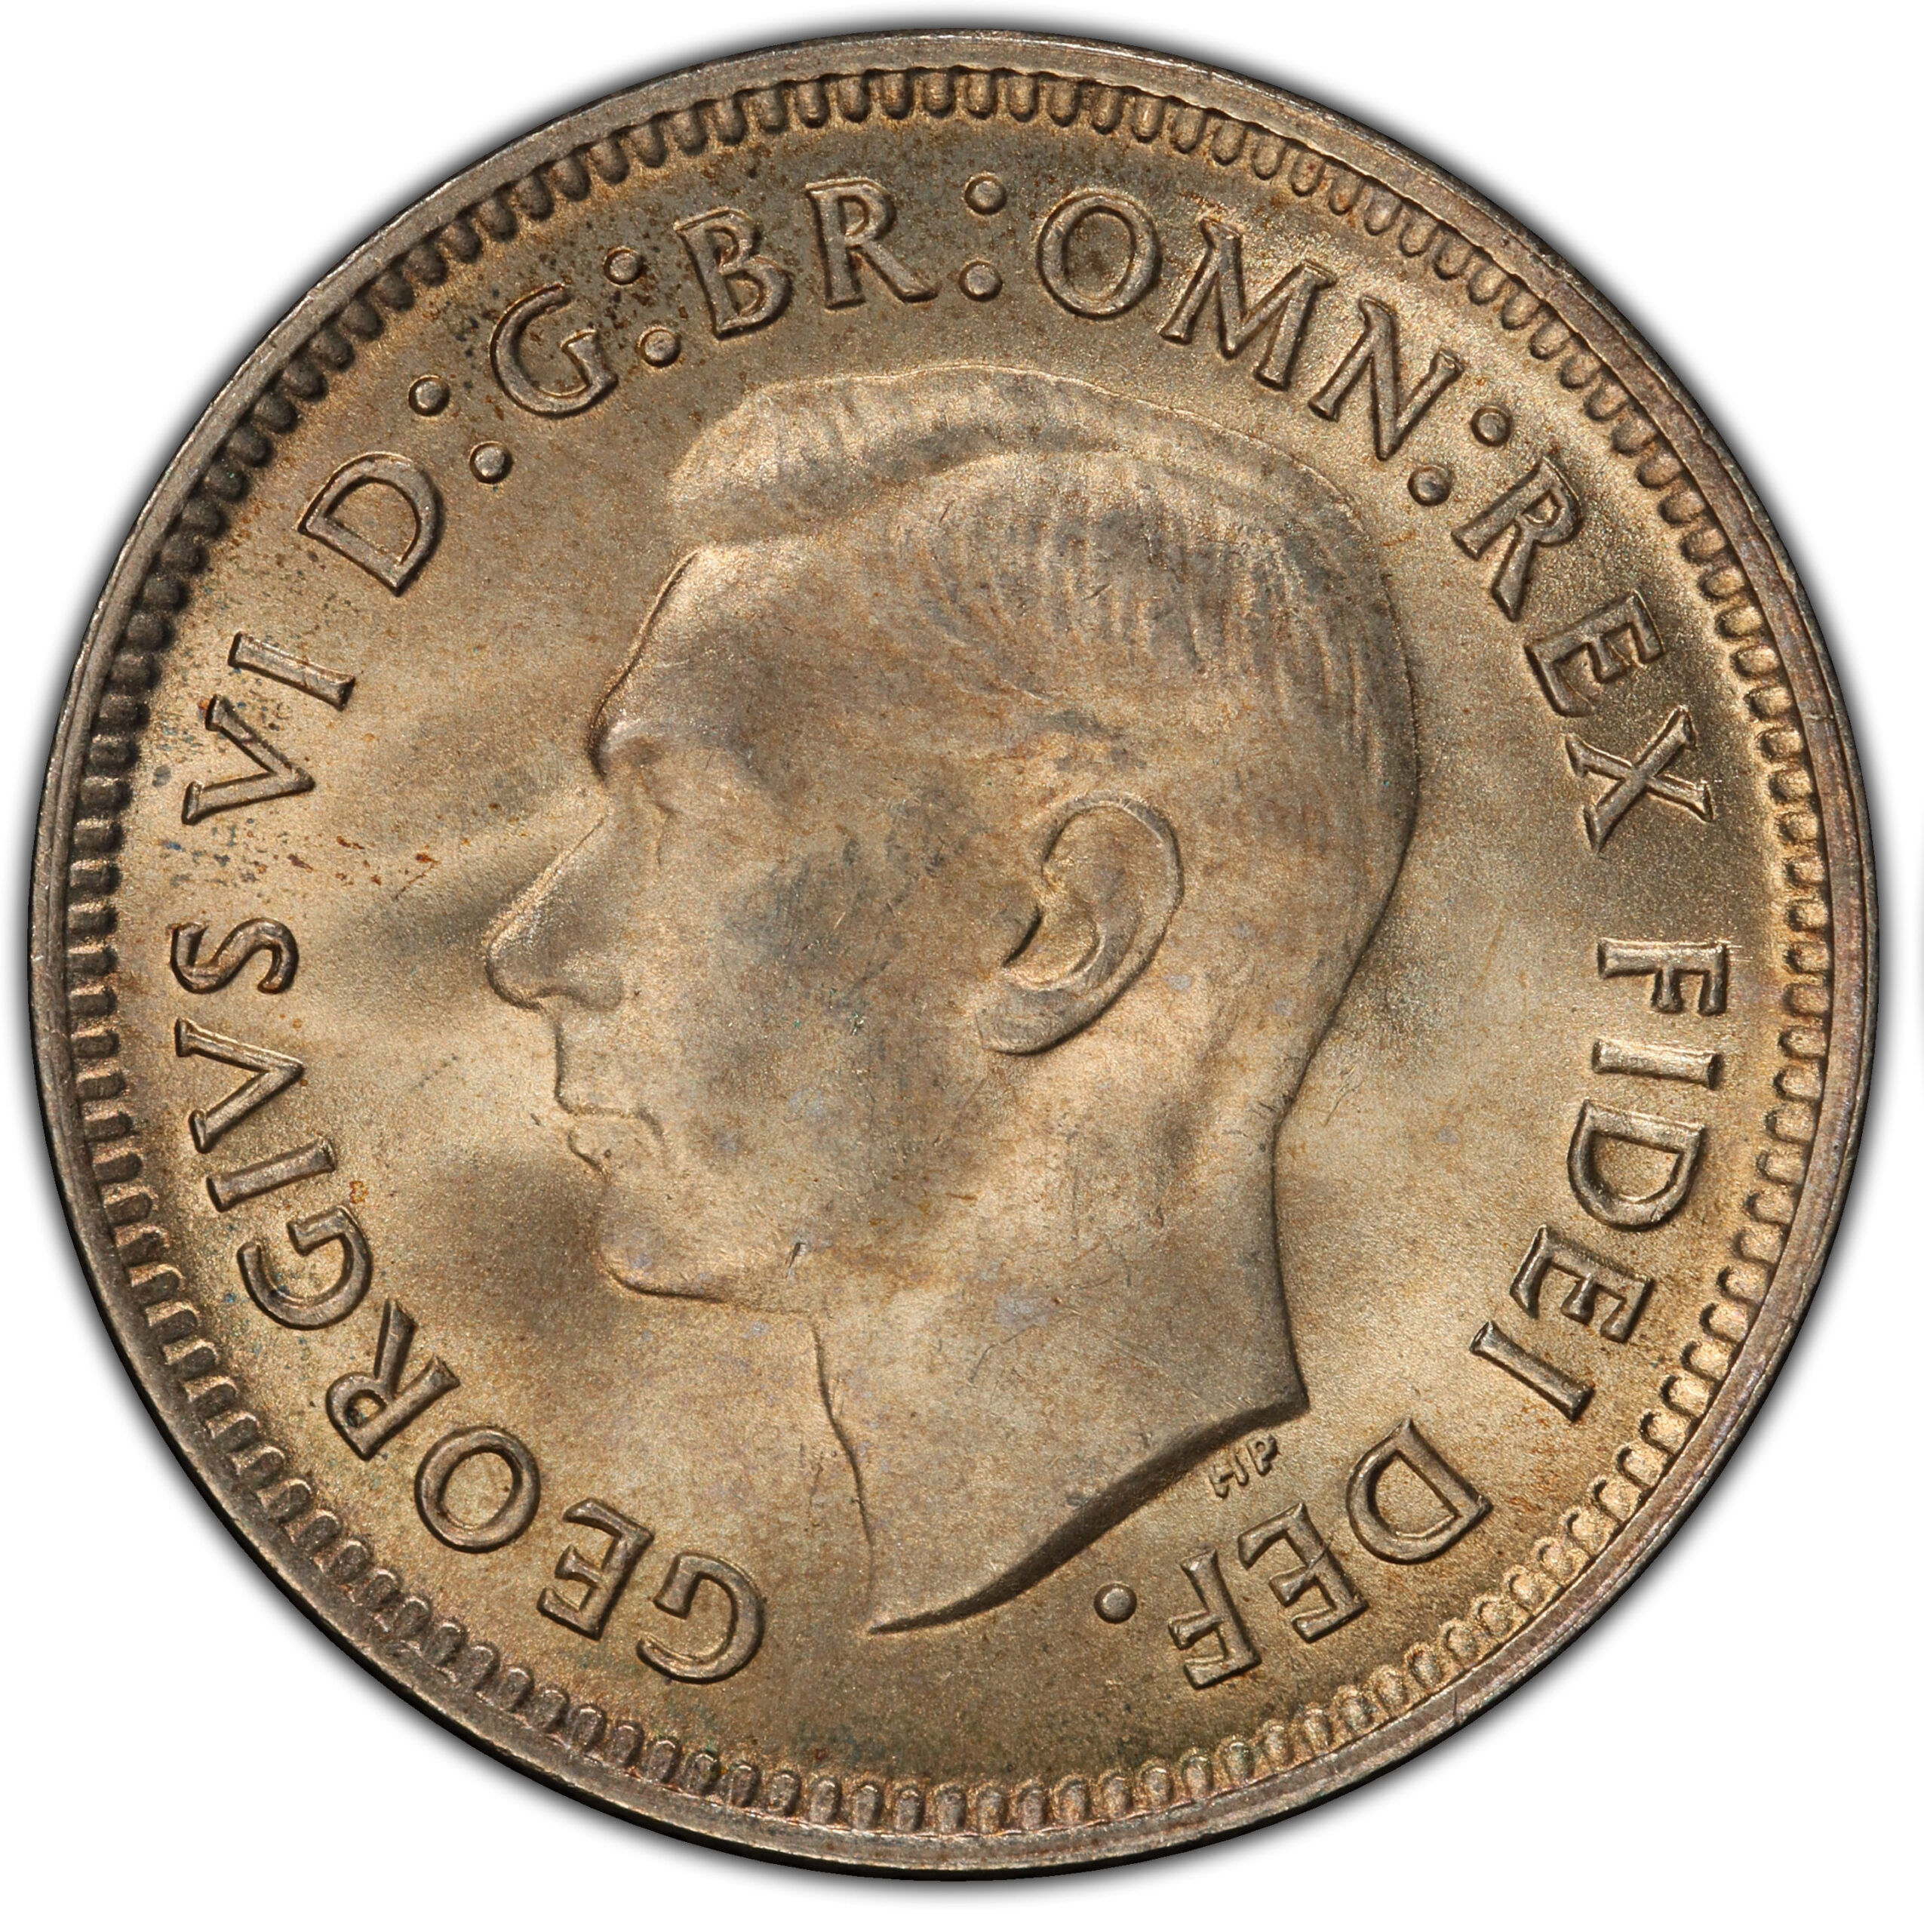
Obverse 4 — 1950–1952
A revised George VI legend was introduced for the later issues. IND IMP disappeared and F.D. was written out as FIDEI DEF, giving this type an easy textual distinction from the earlier George VI obverse.

Obverse 5 — 1953–1954
The first Elizabeth II sixpence obverse introduced a beaded rim in place of the older denticle treatment, creating a clear visual break from the George VI issues.

Obverse 6 — 1955–1963
This later Elizabeth II obverse retained the beaded rim but restored F.D. to the royal legend. It remained the standard sixpence obverse through to the final 1963 issue.
Reverse Master Die Types
Three principal reverse master dies are recorded across the series.
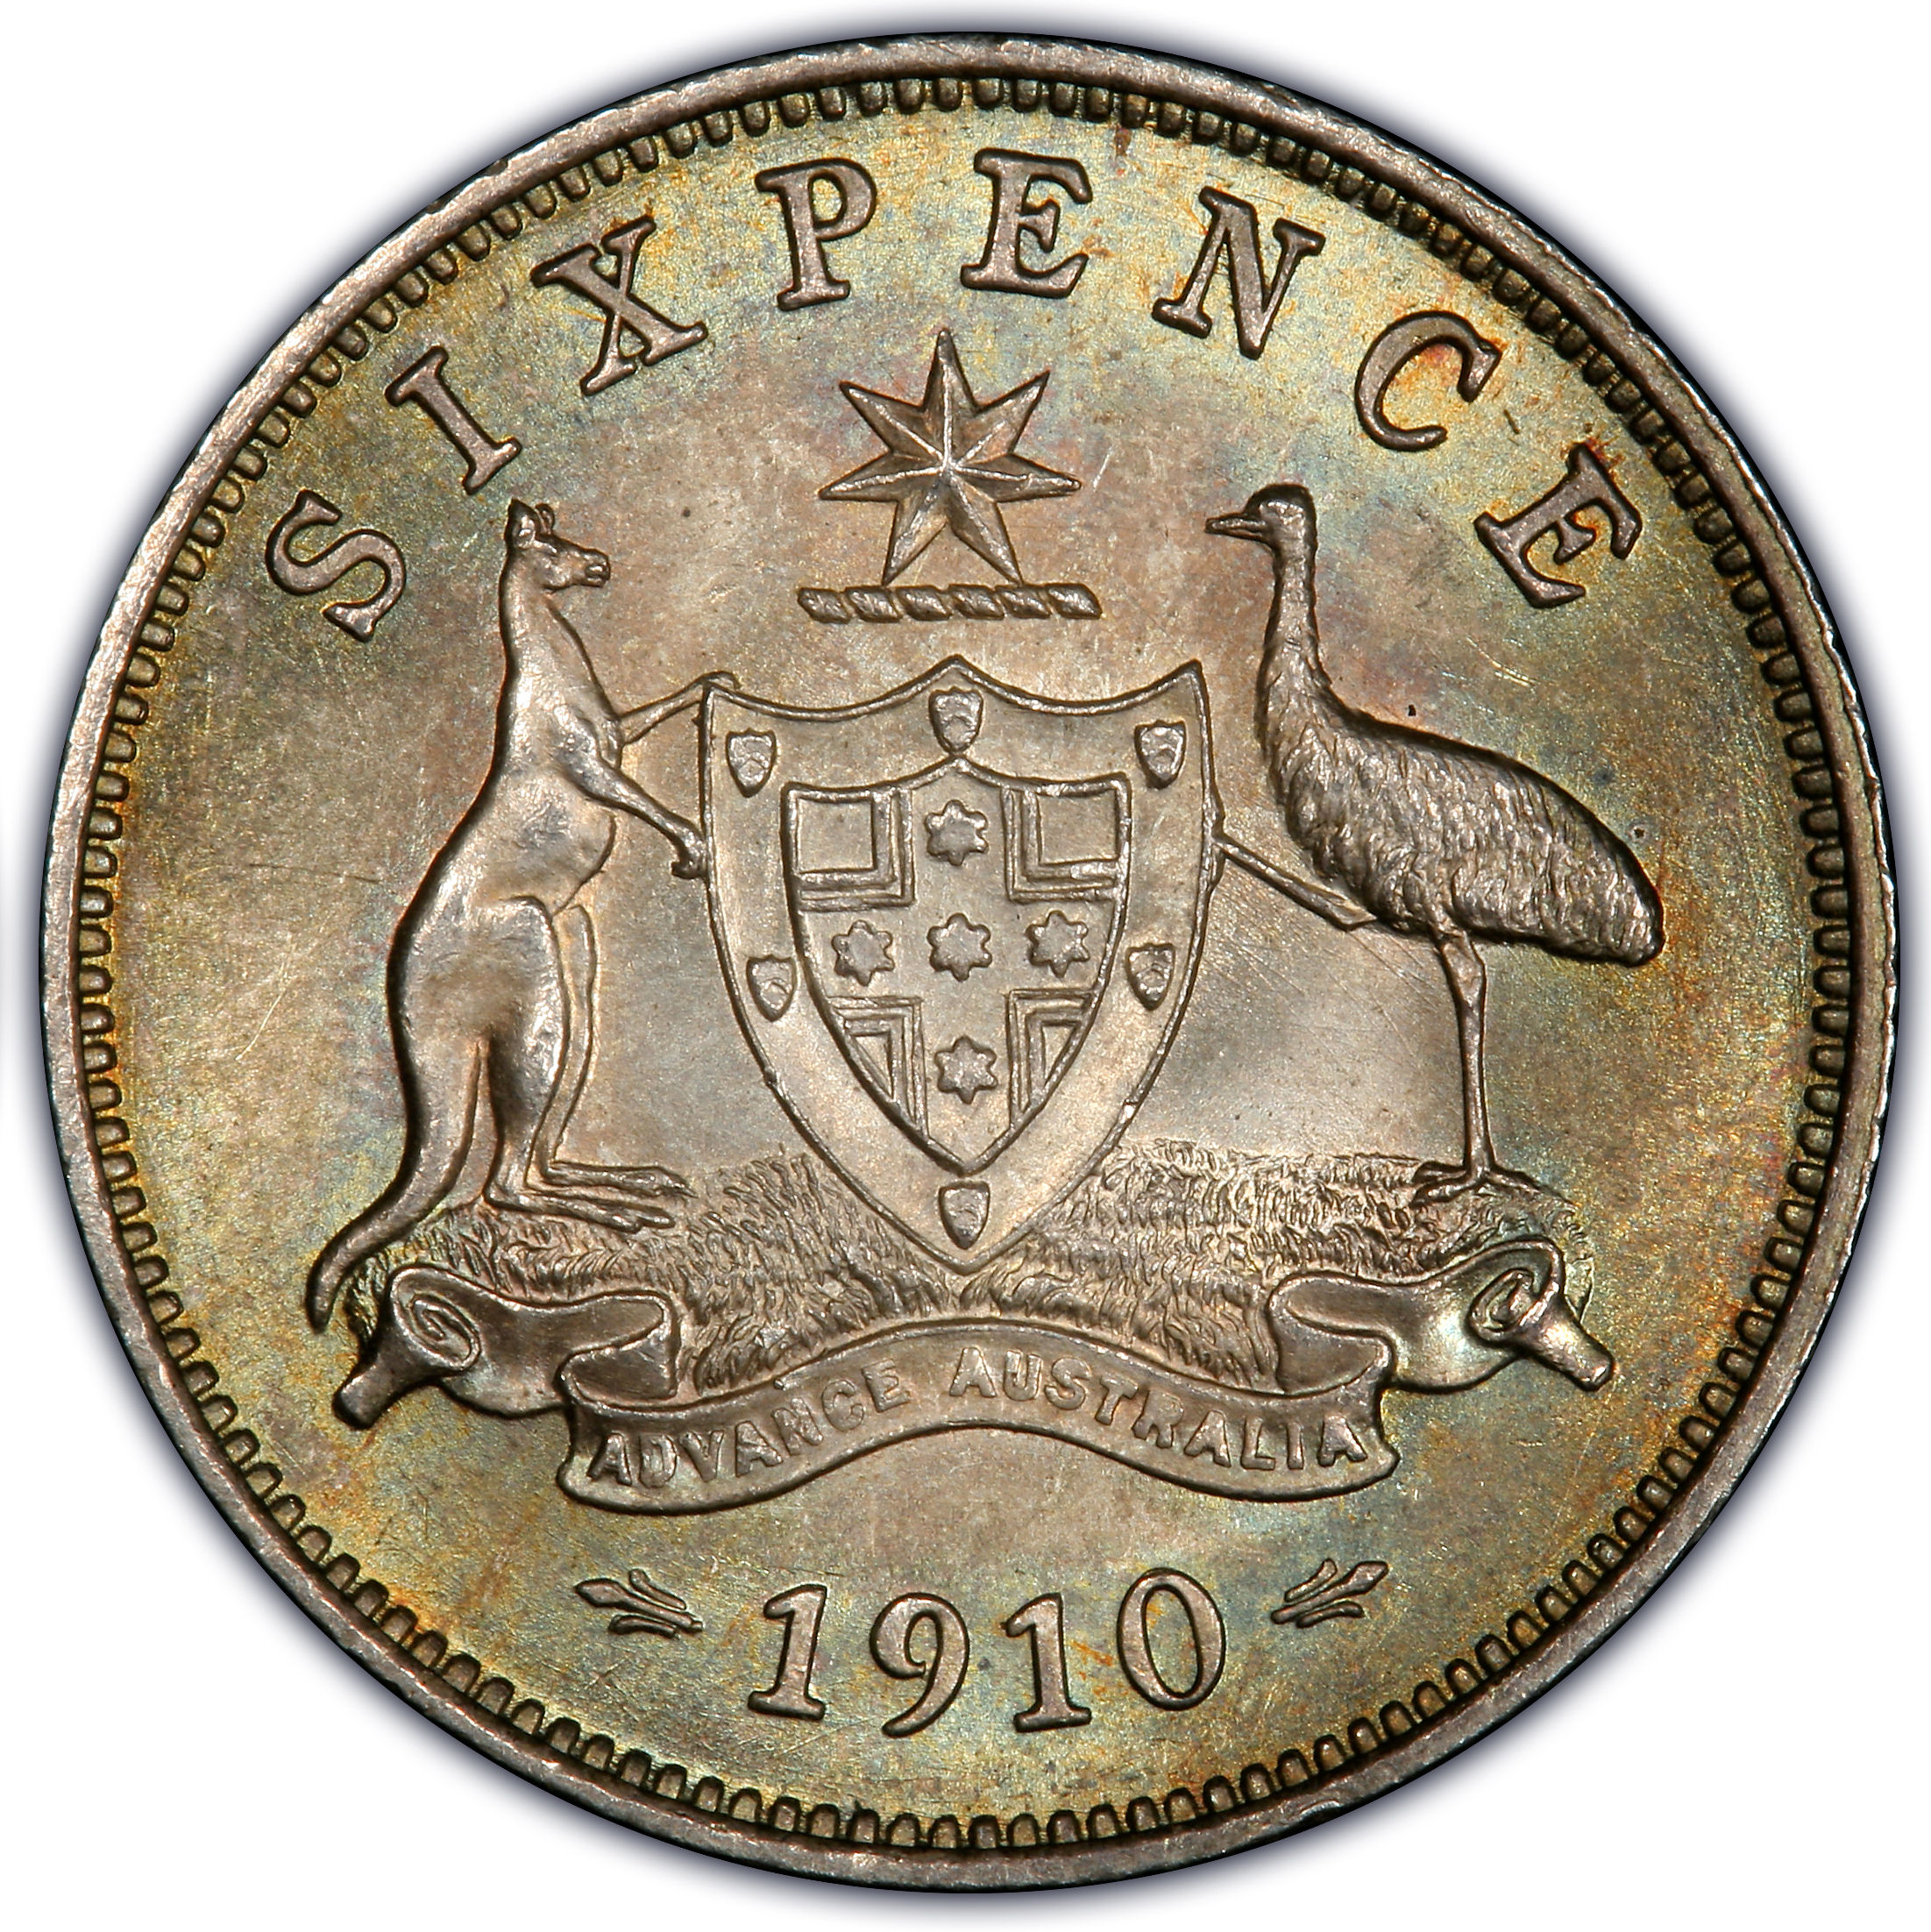
Reverse A
The original sixpence reverse served from 1910 until about 1922. Its most useful visual clues are found around the star and in the slightly off-centre placement of the main design.

Reverse B
Introduced in 1923, Reverse B became the long-running standard reverse for Australian and wartime U.S.-minted sixpences. The design was brought nearer to the centre line, although it still sits just slightly to the right.

Reverse C — 1951 London
This special reverse was used for the large London contribution to the 1951 sixpence issue. Compared with the regular Reverse B, the design is properly centred and the rim count is lower.
Australian Sixpence Die Pairings by Year
This table combines the master-die dates with the mint information supplied for the series. Where more than one mint shared production, the mints are grouped unless the supplied material identifies a separate reverse.
| Year | Obverse | Reverse | Mint | Variety / Mintmark | Notes |
|---|---|---|---|---|---|
| 1910 | O-1 | R-A | London | First year of the Australian sixpence | |
| 1911 | O-2 | R-A | London | ||
| 1912 | O-2 | R-A | London | ||
| 1913 | O-2 | R-A | London | ||
| 1914 | O-2 | R-A | London | ||
| 1915 | O-2 | R-A | London | ||
| 1916 | O-2 | R-A | Melbourne | ||
| 1917 | O-2 | R-A | Melbourne | ||
| 1918 | O-2 | R-A | Melbourne | ||
| 1919 | O-2 | R-A | Melbourne | ||
| 1920 | O-2 | R-A | Melbourne | ||
| 1921 | O-2 | R-A | Melbourne / Sydney | Both mints shared production | |
| 1922 | O-2 | R-A | Sydney | Both mints shared production | |
| 1923 | O-2 | R-B | Melbourne / Sydney | Both mints shared production | |
| 1924 | O-2 | R-B | Melbourne / Sydney | Both mints shared production | |
| 1925 | O-2 | R-B | Melbourne / Sydney | Both mints shared production | |
| 1926 | O-2 | R-B | Melbourne / Sydney | With serif | |
| 1926 | O-2 | R-B | Melbourne / Sydney | Without serif | |
| 1927 | O-2 | R-B | Melbourne | ||
| 1928 | O-2 | R-B | Melbourne | ||
| 1929 | O-2 | R-B | Melbourne | ||
| 1930 | O-2 | R-B | Melbourne | ||
| 1931 | O-2 | R-B | Melbourne | ||
| 1932 | O-2 | R-B | Melbourne | ||
| 1933 | O-2 | R-B | Melbourne | ||
| 1934 | O-2 | R-B | Melbourne | ||
| 1935 | O-2 | R-B | Melbourne | ||
| 1936 | O-2 | R-B | Melbourne | ||
| 1938 | O-3 | R-B | Melbourne | ||
| 1939 | O-3 | R-B | Melbourne | ||
| 1940 | O-3 | R-B | Melbourne | ||
| 1941 | O-3 | R-B | Melbourne | ||
| 1942 | O-3 | R-B | Melbourne | Plain | |
| 1942 | O-3 | R-B | San Francisco | S under scroll | |
| 1942 | O-3 | R-B | Denver | D under scroll | |
| 1943 | O-3 | R-B | San Francisco | S under scroll | |
| 1943 | O-3 | R-B | Denver | D under scroll | |
| 1944 | O-3 | R-B | San Francisco / Denver | ||
| 1945 | O-3 | R-B | Melbourne | ||
| 1946 | O-3 | R-B | Melbourne | ||
| 1947 | O-3 | R-B | Melbourne | ||
| 1948 | O-3 | R-B | Melbourne | ||
| 1950 | O-4 | R-B | Melbourne | ||
| 1951 | O-4 | R-B | Melbourne | ||
| 1951 | O-4 | R-C | London | About 20 million of roughly 34 million struck at the Royal Mint | |
| 1952 | O-4 | R-B | Melbourne | ||
| 1953 | O-5 | R-B | Melbourne | ||
| 1954 | O-5 | R-B | Melbourne | ||
| 1955 | O-6 | R-B | Melbourne | ||
| 1956 | O-6 | R-B | Melbourne | ||
| 1957 | O-6 | R-B | Melbourne | ||
| 1958 | O-6 | R-B | Melbourne | ||
| 1959 | O-6 | R-B | Melbourne | ||
| 1960 | O-6 | R-B | Melbourne | ||
| 1961 | O-6 | R-B | Melbourne | ||
| 1962 | O-6 | R-B | Melbourne | ||
| 1963 | O-6 | R-B | Melbourne |
Quick Legend
O-1 to O-6 = Obverse master die types 1 to 6 | R-A to R-C = Reverse master die types A to C.
Melbourne / Sydney: the supplied reference states that these mintings cannot be separated simply by inspecting the coins. The 1922 issue is the exception, as all sixpences for that year were struck in Sydney.
U.S. wartime production: San Francisco and Denver assisted in 1942, while the entire 1943 and 1944 issues were struck at the U.S. mints.