
Australian Halfpenny Master Dies & Die Pairings
Australian halfpennies were struck with a succession of obverse and reverse master dies between 1911 and 1964. Learning these types makes it much easier to identify the correct die combination for a date, mint and variety.
This guide brings the seven obverse types, five reverse types and the known year-by-year pairings together in one collector-friendly reference.
Obverse Master Die Types
The obverse is the portrait side. Seven principal obverse types are recorded across the Australian halfpenny series.

Obverse 1
Bertram Mackennal’s King George V portrait was the standard obverse for Australian halfpennies from 1911 through 1936.

Obverse 2
An Indian quarter-anna obverse used on only a very small number of 1916 halfpennies. Its appearance on the Australian halfpenny creates the famous 1916 mule pairing.

Obverse 3
Thomas Humphrey Paget’s portrait of George VI. It was used on Australian halfpennies from 1938 to 1948 and matches the obverse used on British halfpennies of 1937–1948.

Obverse 4
Following Indian independence, IND IMP disappeared from the legend and F D was expanded to FIDEI DEF. This type appears on all 1949–1950 halfpennies, the London 1951 issue and most Perth halfpennies of 1951.

Obverse 5
Closely related to Obverse 4, but the rim alignment provides an important identification point. It occurs on some Perth 1951 halfpennies and throughout the 1952 issue.
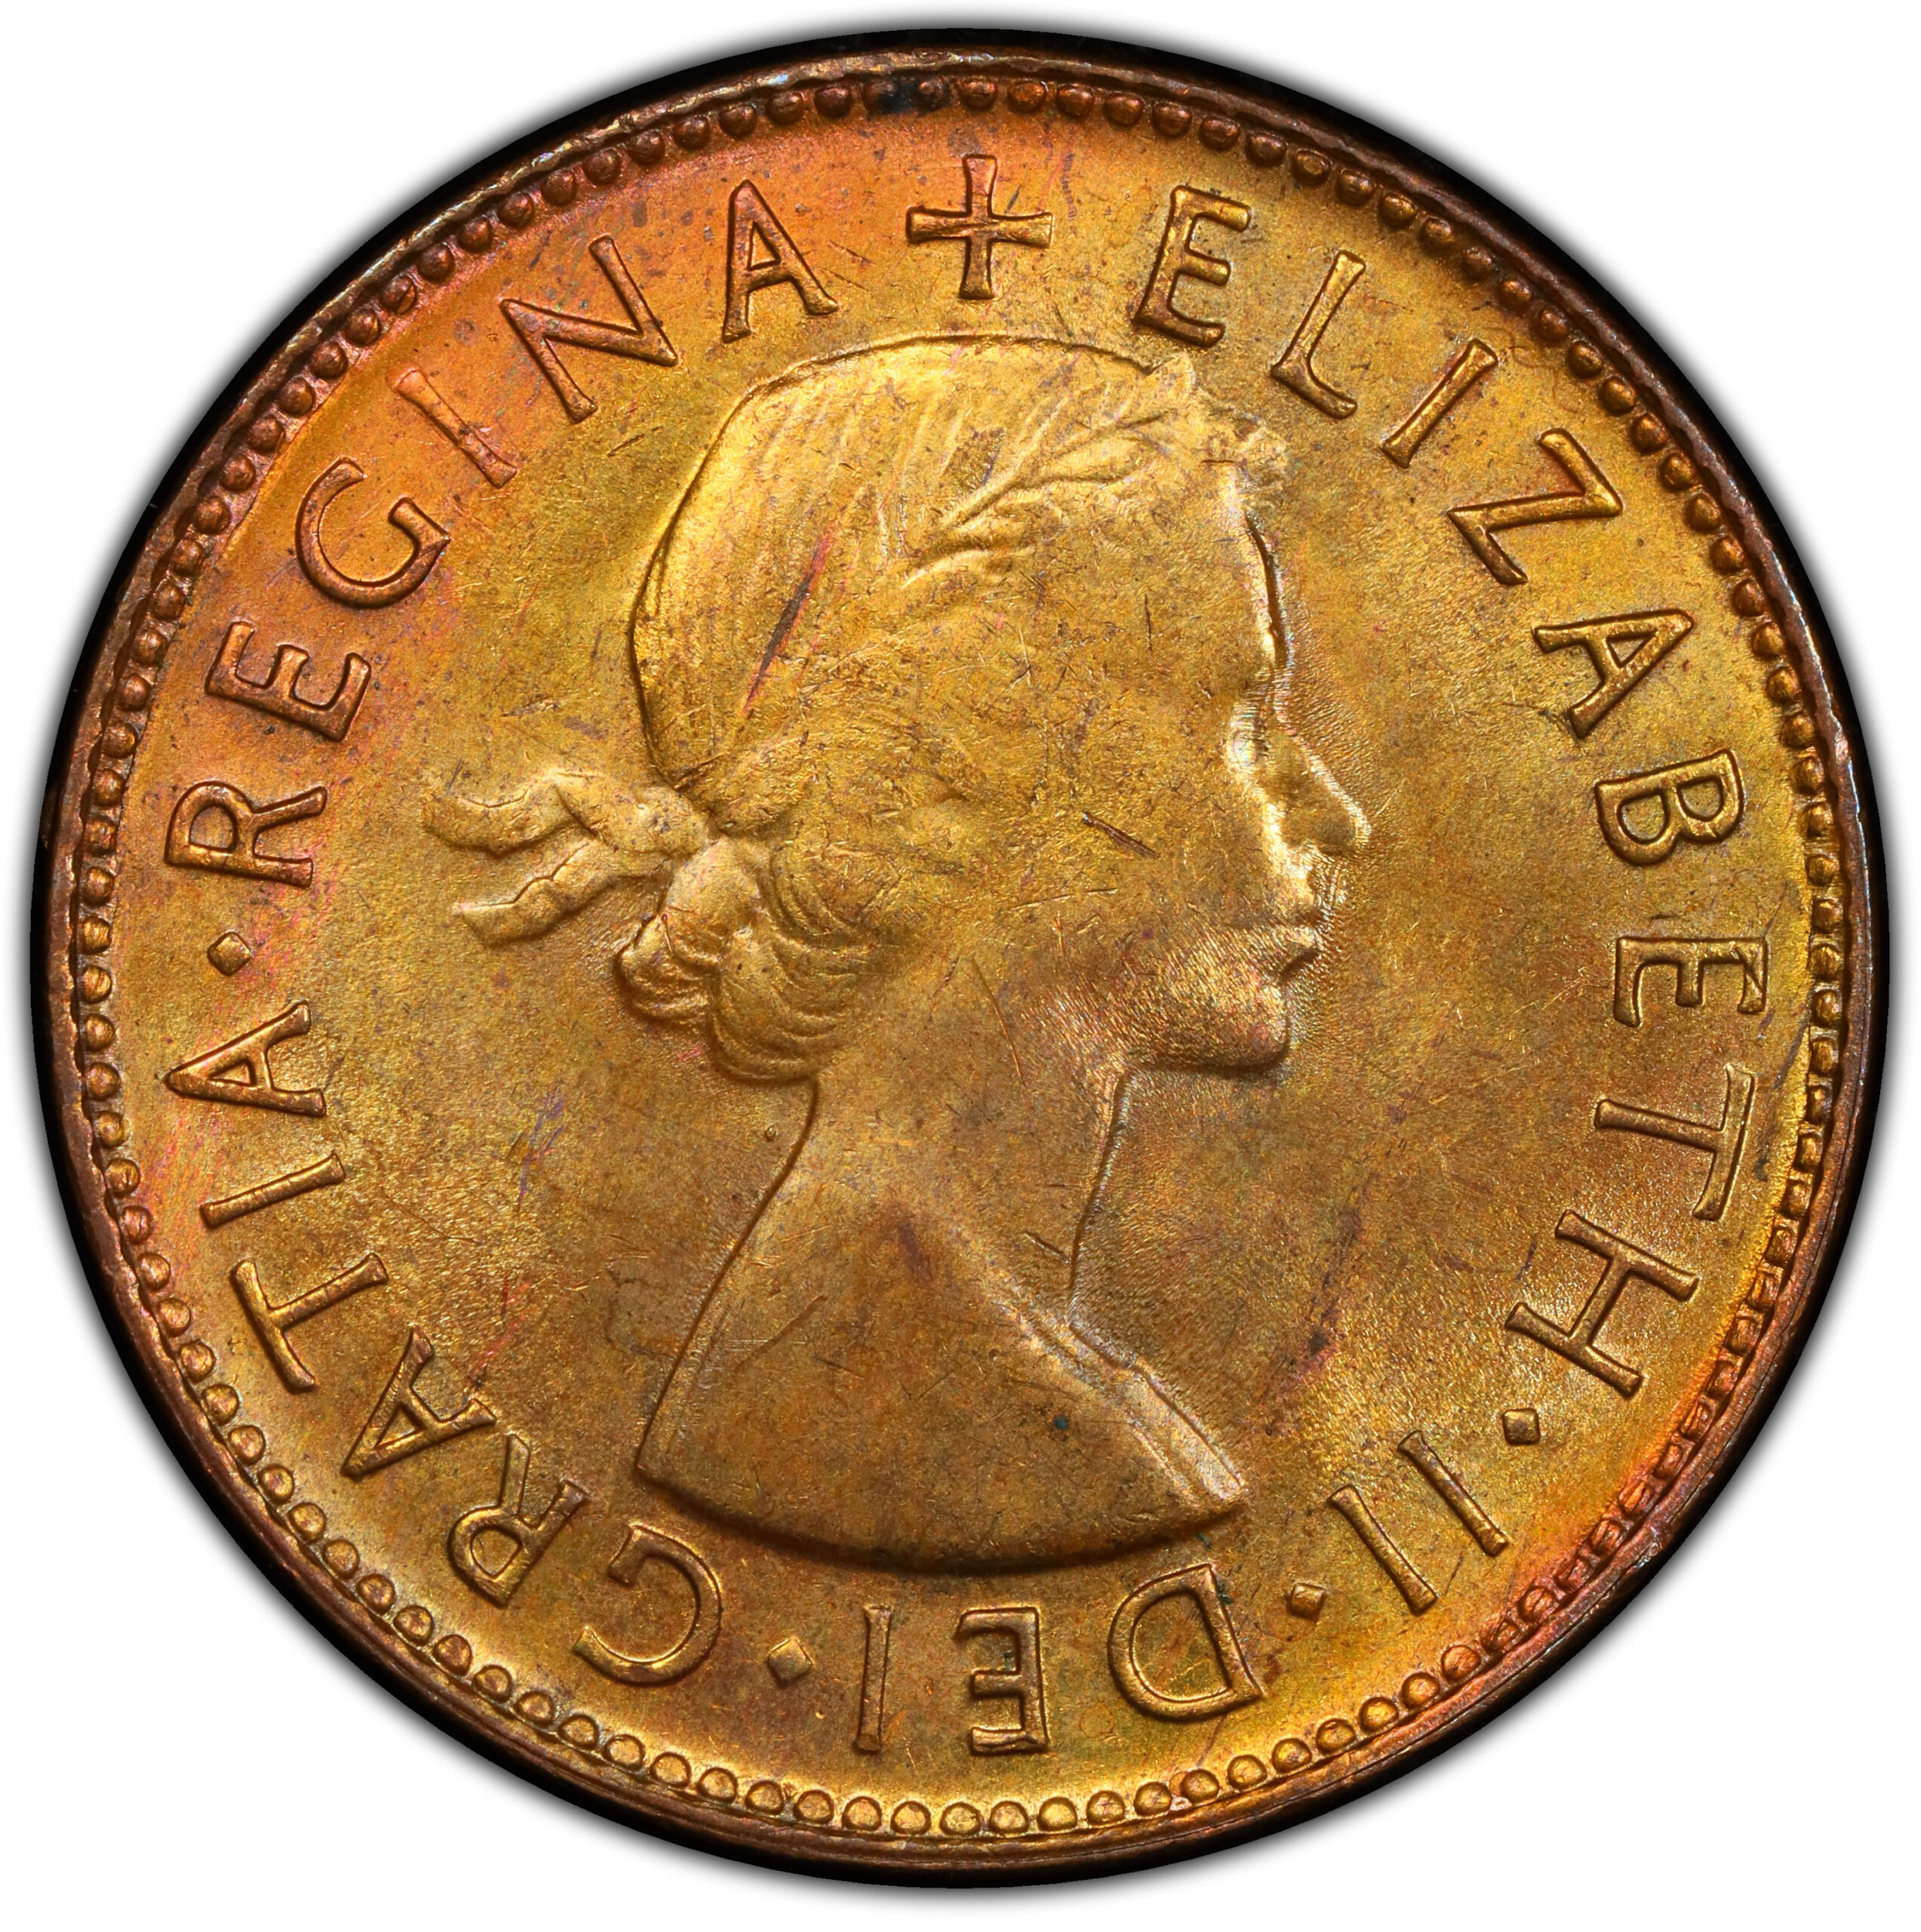
Obverse 6
The first Australian halfpenny obverse to carry Mary Gillick’s portrait of Elizabeth II. Perth used it for halfpennies dated 1953 to 1955. The omission of F D from the legend attracted considerable public attention at the time.
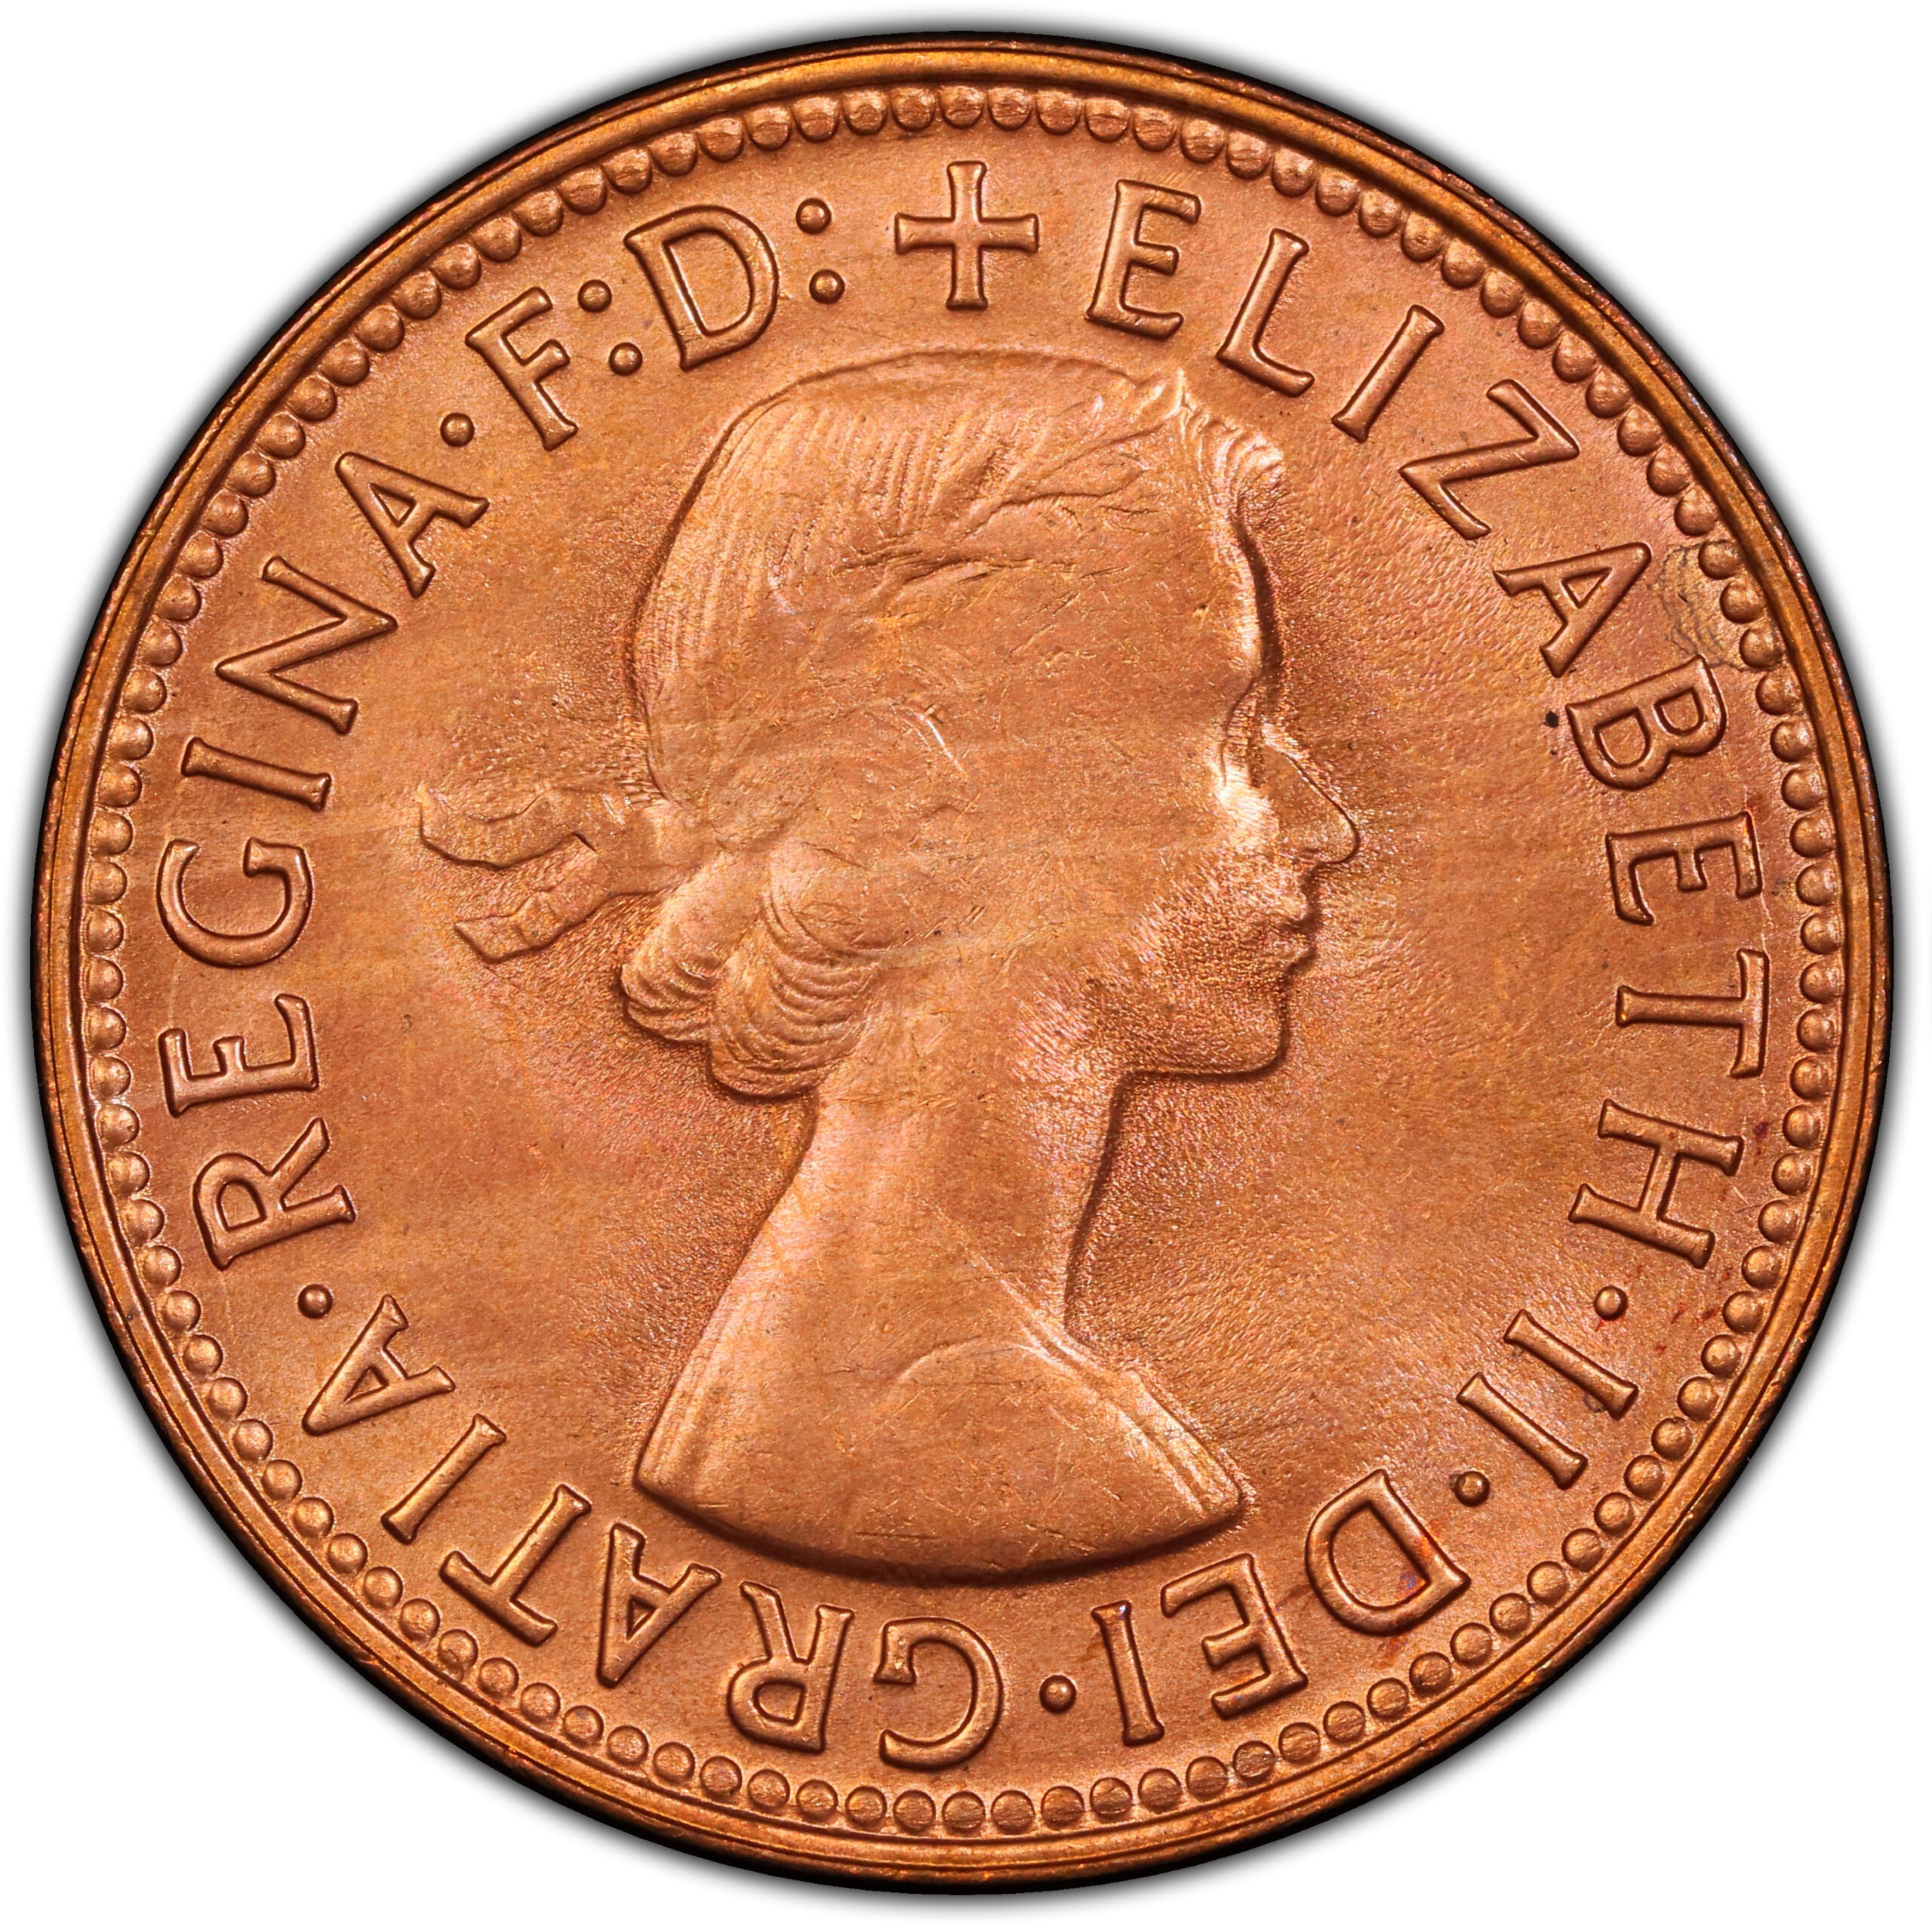
Obverse 7
F D returned to the legend on this revised Elizabeth II obverse. It was used for halfpennies struck at Perth and Melbourne from 1956 until the denomination ended in 1964.
Reverse Master Die Types
Five principal reverse types are used in the series, including distinctive Bombay reverses and the later Reverse E.

Reverse A
W. H. J. Blakemore’s original Commonwealth halfpenny reverse, used from 1911 through 1939.

Reverse B
George Kruger Gray’s kangaroo reverse was introduced late in 1939 and became the principal reverse used by the issuing mints through 1962.

Reverse C
A Bombay reverse used for most 1942 halfpennies. It resembles Reverse B, but differs in lettering, kangaroo-head detail and the lower-profile kangaroo. Dots appear before and after HALF PENNY.

Reverse D
Another Bombay-only reverse, used for part of 1942 and all of 1943. Its noticeably taller denticles are a useful separator from Reverse C. Dots appear before and after HALF PENNY.

Reverse E
Very close to Reverse B in overall design, but with different letter-to-denticle alignment.
Australian Halfpenny Die Pairings by Year
Use this table as a quick reference after identifying the obverse and reverse on the coin.
| Year | Obverse | Reverse | Mint | Variety | Rarity | Notes |
|---|---|---|---|---|---|---|
| 1911 | O-1 | R-A | London | Common | ||
| 1912 | O-1 | R-A | Heaton & Son | Common | ||
| 1913 | O-1 | R-A | London | Date variations | Common | |
| 1914 | O-1 | R-A | London | Common | ||
| 1914 | O-1 | R-A | Heaton & Son | Common | ||
| 1915 | O-1 | R-A | Heaton & Son | Common | ||
| 1916 | O-1 | R-A | Calcutta | Common | ||
| 1916 | O-2 | R-A | Calcutta | Extremely rare | Mule | |
| 1917 | O-1 | R-A | Calcutta | Common | ||
| 1918 | O-1 | R-A | Calcutta | Common | ||
| 1919 | O-1 | R-A | Sydney | Common | ||
| 1920 | O-1 | R-A | Sydney | Common | ||
| 1921 | O-1 | R-A | Sydney | Common | ||
| 1922 | O-1 | R-A | Sydney | Common | ||
| 1923 | O-1 | R-A | Melbourne | Scarce | ||
| 1924 | O-1 | R-A | Melbourne | Common | ||
| 1925 | O-1 | R-A | Melbourne | Common | ||
| 1926 | O-1 | R-A | Melb, Syd | Common | ||
| 1927 | O-1 | R-A | Melbourne | Common | ||
| 1928 | O-1 | R-A | Melbourne | Common | ||
| 1929 | O-1 | R-A | Melbourne | Common | ||
| 1930 | O-1 | R-A | Melbourne | Common | ||
| 1931 | O-1 | R-A | Melbourne | Common | ||
| 1932 | O-1 | R-A | Melbourne | Common | ||
| 1933 | O-1 | R-A | Melbourne | Common | ||
| 1934 | O-1 | R-A | Melbourne | Common | ||
| 1935 | O-1 | R-A | Melbourne | Common | ||
| 1936 | O-1 | R-A | Melbourne | Common | ||
| 1938 | O-3 | R-A | Melbourne | Common | ||
| 1939 | O-3 | R-A | Melbourne | Common | ||
| 1939 | O-3 | R-B | Melbourne | Scarce | ||
| 1940 | O-3 | R-B | Melbourne | Common | ||
| 1941 | O-3 | R-B | Melbourne | Common | ||
| 1942 | O-3 | R-B | Melbourne | Scarce | ||
| 1942 | O-3 | R-B | Perth | Dot after Y | Common | |
| 1942 | O-3 | R-C | Bombay | I below bust | Common | |
| 1942 | O-3 | R-D | Bombay | I below bust | Rare | Tall denticles |
| 1943 | O-3 | R-B | Melbourne | Common | ||
| 1943 | O-3 | R-D | Bombay | I below bust | Common | |
| 1944 | O-3 | R-B | Melbourne | Common | ||
| 1945 | O-3 | R-B | Perth | Y. | Common | |
| 1945 | O-3 | R-B | Perth | Common | No dot | |
| 1946 | O-3 | R-B | Perth | Y. | Common | |
| 1947 | O-3 | R-B | Perth | Y. | Common | |
| 1948 | O-3 | R-B | Melbourne | Common | ||
| 1948 | O-3 | R-B | Perth | Y. | Common | |
| 1949 | O-4 | R-B | Perth | Y. | Common | |
| 1950 | O-4 | R-B | Perth | Y. | Common | |
| 1951 | O-4 | R-B | London, Heaton | PL | Common | |
| 1951 | O-4 | R-B | Perth | Y | Common | |
| 1951 | O-4 | R-B | Perth | Scarce | No dot | |
| 1951 | O-5 | R-B | Perth | Y. | Common | |
| 1951 | O-5 | R-B | Perth | Scarce | No dot | |
| 1952 | O-5 | R-B | Perth | Y. | Common | |
| 1953 | O-6 | R-B | Perth | A. | Common | |
| 1954 | O-6 | R-B | Perth | Y. | Common | |
| 1955 | O-6 | R-B | Perth | Common | ||
| 1959 | O-7 | R-B | Melbourne | Common | ||
| 1959 | O-7 | R-B | Perth | Y. | Common | |
| 1960 | O-7 | R-B | Perth | Y. | Common | |
| 1961 | O-7 | R-B | Perth | Y. | Common | |
| 1962 | O-7 | R-B | Perth | Y. | Common | |
| 1963 | O-7 | R-E | Perth | Y. | Common | |
| 1964 | O-7 | R-E | Perth | Y. | Common |
Quick Legend
O-1 to O-7 = Obverse master die types 1 to 7 | R-A to R-E = Reverse master die types A to E.
Y. / Y, A., PL and other entries in the Variety column reproduce the identifying notation shown in the supplied die-pairing reference.
Important: Rarity refers to the die pairing or listed variety, not automatically to every halfpenny of that date.